Making Four-In-A-Row Using JavaScript - Part 7: Drawing The Board
Intro#
Welcome back! In the previous blog post, you set up the canvas and created drawings on it. Now in this post, you'll draw the game board.
Game Objects#
What Is A Game Object?#
The game features multiple drawings on the canvas. These distinct drawings take up space both horizontally and vertically. They may be made up of other smaller related drawings. These distinct drawings will be referred to as "game objects".
Why Do We Need Game Objects?#
Looking back at the breakdown of the game's UI. Three components can be identified:
- Status Area
- Game Board
- Play Again Button
All of these components share the following things in common:
- They have position
- They have dimensions
- All drawn on the canvas
When referring to these components in a generalised way, we'll be considering these common traits and properties only. In the context of this game, the general name for these components will be "Game Object". The components listed above are all game objects.
To represent this relationship in code, you'll create a GameObject class. The component classes will inherit from the GameObject class. This will avoid you from rewriting the common logic and properties shared across all the components.
Creating The GameObject Class#
Unlike with the HTML elements, you will have to implement the size and positioning of game objects yourself. You'll also have to draw the game objects yourself too.
Create a directory under the src directory called components.
In the src/components directory, create a new file called GameObject.js.
In src/components/GameObject.js, add the following to the file:
export default class GameObject {
    x;
    y;
    width;
    height;
    context; // CanvasRenderingContext2D

    constructor(context, x, y, width, height) {
        this.context = context;
        this.x = x;
        this.y = y;
        this.width = width;
        this.height = height;
    }

    clear() {
        this.context.clearRect(this.x, this.y, this.width, this.height);
    }
}
Inheriting The GameObject Class#
Now that you've created the GameObject class, in the src/components directory, create a new file named Board.js. After, in that file, create a Board class that inherits from the GameObject class:
import GameObject from "./GameObject.js";

export default class Board extends GameObject {

}
To test out whether the GameObject is being inherited by Board correctly, you'll recreate the last post's white rectangle drawing using the Board class.
Add a method called render() to the Board class that will render a white rectangle and then restore the state of the context object:
import GameObject from "./GameObject.js";

export default class Board extends GameObject {
    render() {
        this.context.save();
        this.clear();
        this.context.fillStyle = "white";
        this.context.fillRect(this.x, this.y, this.width, this.height);
        this.context.restore();
    }
}
Notice how the x, y, width, and height fields were not defined in Board. This is because they were inherited from GameObject.
Create a new file in src/components called index.js and fill it with the following contents:
import Board from "./Board.js";

export { Board };
This code block above exports the Board class as a module, making it available to import from src/components/index.js. There will be more components in the future. This change will simplify the code required to import multiple components over time.
Return to the FrontEnd class. Import the Board class from src/components/index.js:
import { FrontEndConfig } from "./constants/index.js";
import { Board } from "./components/index.js";
Add a field called board:
export default class FrontEnd {
    game;
    canvas;
    width;
    height;
    context;
    board;

    // ...
}
Rewrite the start() method in the Board class:
- Set the
boardfield to a new instance of theBoardclass - Call the
render()method onboard
export default class FrontEnd {
// ..
start() {
this.board = new Board(this.context, 20, 20, 50, 100);
this.board.render();
}
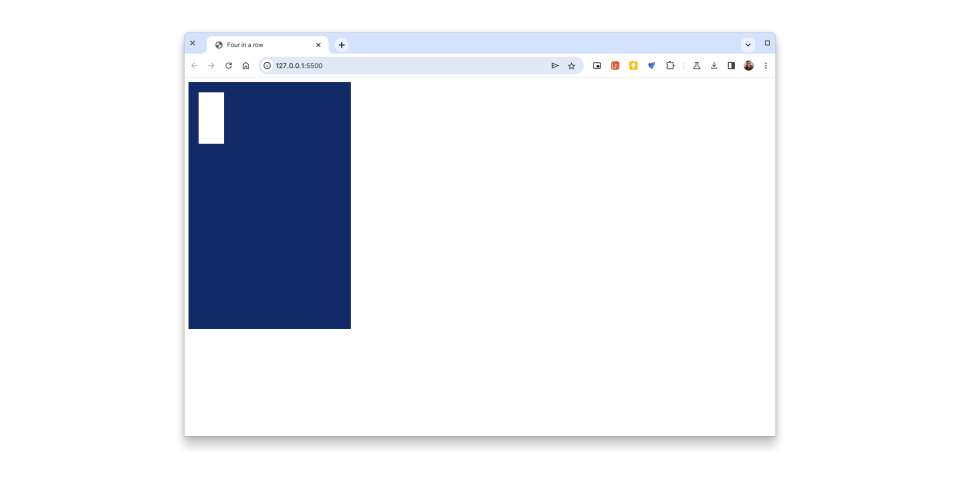
}Notice that the Board uses the same constructor defined in GameObject.
If you check the game with your web server, you'll see the same white rectangle drawn on the canvas as the one you drew in the previous blog post.
Drawing The Game Board#
Awesome! You've figured out how to create your game object and draw it on the canvas. Now it's time to draw the actual game board.
Board Background#
In src/components/Board.js, import BoardConfig from the constants file:
import GameObject from './GameObject.js';
import { BoardConfig } from '../constants/index.js';
Then create a new method in the Board class called renderBoardBackground().
After, perform the following steps:
- Move the code that draws the white rectangle into the
renderBoardBackground()method - Replace the fill style with the
BACKGROUND_COLORfield defined in the importedBoardConfigobject.
import GameObject from "./GameObject.js";
import { BoardConfig } from "../constants/index.js";

export default class Board extends GameObject {
    render() {
        this.context.save();
        this.clear();
        this.renderBoardBackground();
        this.context.restore();
    }

    renderBoardBackground() {
        this.context.fillStyle = BoardConfig.BACKGROUND_COLOR;
        this.context.fillRect(this.x, this.y, this.width, this.height);
    }
}
In the FrontEnd class, import BoardConfig from the constants file:
import { FrontEndConfig, BoardConfig } from "./constants/index.js";Add a method called createBoard() then do the following:
- In
createBoard(), create a local variable that stores a new instance of theBoardclass, calls therender()method on it then returns it. - Rewrite the
start()method so that theboardfield is set to the result returned from calling thecreateBoard()method
export default class FrontEnd {
// ..
start() {
this.board = this.createBoard();
}
createBoard() {
let board = new Board(this.context, BoardConfig.MARGIN_LEFT, BoardConfig.MARGIN_TOP, BoardConfig.WIDTH, BoardConfig.HEIGHT);
board.render();
return board;
}
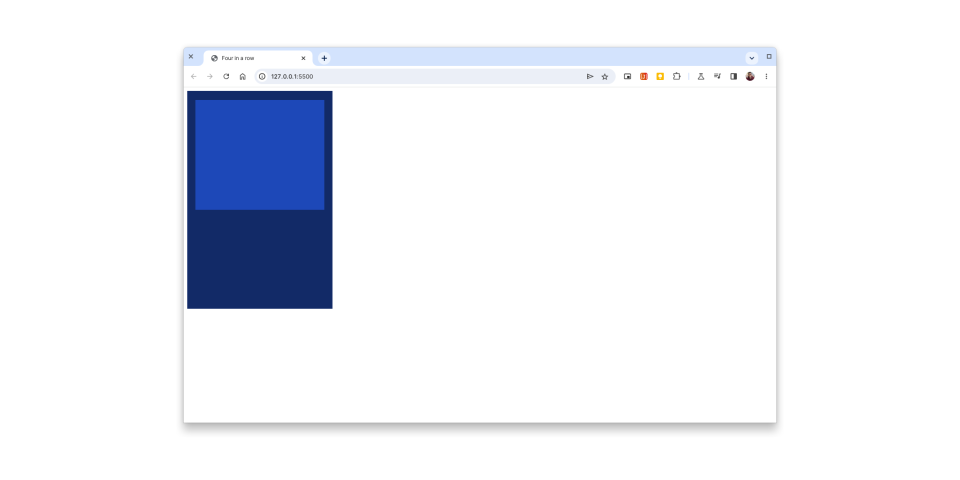
}The board is now created with the positioning and dimensions from mockups of the game.
Now, with a web server running, if you check your game in your browser, you'll see that a blue rectangle has been rendered on the canvas.
Board Slots#
Now you're ready to draw the slots on the board.
Add a parameter called nextBoard to the Board class' render() method:
export default class Board extends GameObject {
    render(nextBoard) {
        this.context.save();
        this.clear();
        this.renderBoardBackground();
        this.context.restore();
    }

    // ..
nextBoard will contain the state of the board. It's an array of arrays of numbers representing the tokens in each board position. These will be used to render the board tokens in the slots.
Next, add a method called renderSlots() to the Board class. To keep the upcoming drawing commands simple, you'll modify the point of origin where you start drawing the slots. This way, you won't have to consider padding in later drawing commands in renderSlots(). To do this, you'll use the CanvasRenderingContext2D.translate() method:
export default class Board extends GameObject {
    // ..

    renderSlots(nextBoard) {
        this.context.translate(this.x + BoardConfig.HORIZONTAL_PADDING, this.y + BoardConfig.VERTICAL_PADDING);
    }
Start drawing the slots.
Set the stroke colour and line width:
this.context.strokeStyle = BoardConfig.SLOT_OUTLINE_COLOR;
this.context.lineWidth = 2;
Store the radius of a slot in a local variable called slotRadius:
const slotRadius = BoardConfig.SLOT_WIDTH / 2;Update import statements in src/components/Board.js to include TokenColor from the constants directory and Constants from the gameLogic directory:
import { BoardConfig, TokenColor } from "../constants/index.js";
import { Constants } from "../gameLogic/index.js";
import GameObject from "./GameObject.js";
Loop through each slot on the board and:
- Calculate the positioning:
- Obtain the token colour to render the slot with
for (let rowIndex = 0; rowIndex < Constants.BoardDimensions.ROWS; rowIndex++) {
    for (let columnIndex = 0; columnIndex < Constants.BoardDimensions.COLUMNS; columnIndex++) {
        // Note slot is a circle. (x, y) coordinates are the circle's centre.
        const totalSlotMarginsX = BoardConfig.SLOT_MARGIN * columnIndex;
        const totalPreviousSlotWidthsX = BoardConfig.SLOT_WIDTH * columnIndex;
        const slotX = totalSlotMarginsX + totalPreviousSlotWidthsX + slotRadius;

        const totalSlotMarginsY = BoardConfig.SLOT_MARGIN * rowIndex;
        const totalPreviousSlotWidthsY = BoardConfig.SLOT_WIDTH * rowIndex;
        const slotY = totalSlotMarginsY + totalPreviousSlotWidthsY + slotRadius;

        const tokenColorValue = nextBoard[rowIndex][columnIndex];

        let tokenColor;

        switch (tokenColorValue) {
            case Constants.BoardToken.YELLOW:
                tokenColor = TokenColor.YELLOW;
                break;
            case Constants.BoardToken.RED:
                tokenColor = TokenColor.RED;
                break;
            default:
                tokenColor = TokenColor.NONE
                break;
        }
    }
}
You now have the values you need to render each slot. To do so, add a method called renderSlot() to the Board class:
export default class Board extends GameObject {
    // ..

    renderSlot(x, y, radius, color) {
        this.context.beginPath();
        this.context.arc(x, y, radius, 0, Math.PI * 2);
        this.context.closePath();
        this.context.stroke();

        this.context.fillStyle = color;
        this.context.beginPath();
        this.context.arc(x, y, radius - 1, 0, Math.PI * 2);
        this.context.closePath();
        this.context.fill();
    }
}
Now, call renderSlot() right after the switch block in renderSlots():
renderSlots(nextBoard) {
    this.context.translate(this.x + BoardConfig.HORIZONTAL_PADDING, this.y + BoardConfig.VERTICAL_PADDING);
    this.context.strokeStyle = BoardConfig.SLOT_OUTLINE_COLOR;
    this.context.lineWidth = 2;

    const slotRadius = BoardConfig.SLOT_WIDTH / 2;

    for (let rowIndex = 0; rowIndex < Constants.BoardDimensions.ROWS; rowIndex++) {
        for (let columnIndex = 0; columnIndex < Constants.BoardDimensions.COLUMNS; columnIndex++) {
            // Note slot is a circle. (x, y) coordinates are the circle's centre.
            const totalSlotMarginsX = BoardConfig.SLOT_MARGIN * columnIndex;
            const totalPreviousSlotWidthsX = BoardConfig.SLOT_WIDTH * columnIndex;
            const slotX = totalSlotMarginsX + totalPreviousSlotWidthsX + slotRadius;

            const totalSlotMarginsY = BoardConfig.SLOT_MARGIN * rowIndex;
            const totalPreviousSlotWidthsY = BoardConfig.SLOT_WIDTH * rowIndex;
            const slotY = totalSlotMarginsY + totalPreviousSlotWidthsY + slotRadius;

            const tokenColorValue = nextBoard[rowIndex][columnIndex];

            let tokenColor;

            switch (tokenColorValue) {
                case Constants.BoardToken.YELLOW:
                    tokenColor = TokenColor.YELLOW;
                    break;
                case Constants.BoardToken.RED:
                    tokenColor = TokenColor.RED;
                    break;
                default:
                    tokenColor = TokenColor.NONE
                    break;
            }

            this.renderSlot(slotX, slotY, slotRadius, tokenColor);
        }
    }
}
Add a call to renderSlots() in the render() method:
render(nextBoard) {
    this.context.save();
    this.clear();
    this.renderBoardBackground();
    this.renderSlots(nextBoard);
    this.context.restore();
}
Lastly, in the FrontEnd class, update the board.render() method call in createBoard() so that you pass in the current board state:
export default class FrontEnd {
    // ..

    createBoard() {
        let board = new Board(this.context, BoardConfig.MARGIN_LEFT, BoardConfig.MARGIN_TOP, BoardConfig.WIDTH, BoardConfig.HEIGHT);
        board.render(this.game.currentBoard);
        return board;
    }
}
If you check your browser now while your server is running, you'll see empty slots drawn on the board:

Making The Game Playable#
You can attempt to hardcode a board state argument when calling the render() method on the board variable. The game will render the board state accordingly.
However, you currently aren't able to update the board state in-game.
One way to update the board state in-game is by responding to clicks on the canvas.
Unlike with HTML elements, you can't just rely on the built-in DOM events system to handle clicks on our game objects. Since you're drawing on the canvas, you'll have to handle the hit detection yourself and come up with your own event-handling interface.
Introducing Your Event Handling API#
In this game, you'll detect clicks by listening for the click event on the body of the page and then pass on the event data to relevant game objects to be processed.
To get started with this, add a new method to the GameObject class called handleClick():
export default class GameObject {
    x;
    y;
    width;
    height;
    context;

    constructor(context, x, y, width, height) {
        this.context = context;
        this.x = x;
        this.y = y;
        this.width = width;
        this.height = height;
    }

    clear() {
        this.context.clearRect(this.x, this.y, this.width, this.height);
    }

    handleClick(clickEvent) { }
}
handleClick() will be overridden by the GameObject class' inheritors. The inheritors will add logic to the handleClick() method for handling event data from clicks.
Implementing Your Event Handling API#
Now, in the Board class, add a field called columnSelected. This will be used to store a callback. The callback will contain logic to run that will be defined in the FrontEnd class:
export default class Board extends GameObject {
    columnSelected;

    // ..
}
After that, add a method called setColumnSelectionHandler(), which will be used to set the logic that will run from the callback:
export default class Board extends GameObject {
    // ..

    setColumnSelectionHandler(callback) {
        this.columnSelected = callback;
    }
}
You now have the prerequisites for overriding handleClick() in the Board class.
Add the following methods to the Board class:
handleClick()trySelectColumn()
export default class Board extends GameObject {
    // ..

    handleClick(clickEvent) {
        this.trySelectColumn(clickEvent);
    }

    trySelectColumn(clickEvent) {
        for (let columnIndex = 0; columnIndex < Constants.BoardDimensions.COLUMNS; columnIndex++) {
            const totalSlotMargins = BoardConfig.SLOT_MARGIN * columnIndex;
            const totalPreviousSlotWidths = BoardConfig.SLOT_WIDTH * columnIndex;
            const columnX = this.x + BoardConfig.HORIZONTAL_PADDING + totalSlotMargins + totalPreviousSlotWidths;

            const wasColumnClicked = clickEvent.offsetX >= columnX
                && clickEvent.offsetX <= (columnX + BoardConfig.SLOT_WIDTH)
                && clickEvent.offsetY >= this.y + BoardConfig.VERTICAL_PADDING
                && clickEvent.offsetY <= this.y + BoardConfig.HEIGHT - BoardConfig.VERTICAL_PADDING;

            if (wasColumnClicked) {
                this.columnSelected(columnIndex);
                break;
            }
        }
    }
}
The trySelectColumn() method figures out if the player clicked a column. If the player has clicked on a column, it will run the columnSelected callback with the selected column's position index. For example, the leftmost column would have an index of 0, and the third column would have an index of 2.
Adding the callback logic#
Finally, you'll set up the click events in the FrontEnd class and handle them.
In the start method, add an event listener for clicks on the document's body. This will call the handleClick() method on the board with event data:
export default class FrontEnd {
    // ..

    start() {
        this.board = this.createBoard();

        document.body.addEventListener('click', (clickEvent) => {
            this.board.handleClick(clickEvent);
        });
    }
}
Now, you'll add the logic that will run in the Board class' selectedColumn callback.
Add a field called gameOver in the FrontEnd class. Set its value to false in the FrontEnd class' constructor:
export default class FrontEnd {
    game;
    canvas;
    width;
    height;
    context;
    board;
    gameOver;


    constructor(game) {
        this.game = game;
        this.canvas = document.getElementById("canvas");
        this.canvas.style.background = FrontEndConfig.GAME_BACKGROUND_COLOR;
        this.width = canvas.width;
        this.height = canvas.height;
        this.context = this.canvas.getContext("2d");
        this.gameOver = false;

        this.enableHiDPISupport();
    }

    // ..
}
Update the import statements in src/FrontEnd.js to include Constants from the gameLogic directory:
import { FrontEndConfig, BoardConfig } from "./constants/index.js";
import { Board } from "./components/index.js";
import { Constants } from "./gameLogic/index.js";
Create the following methods: playMove() and processMoveResult():
export default class FrontEnd {
    // ..

    playMove(columnIndex) {
        let moveResult = this.game.playMove(columnIndex);
        this.processMoveResult(moveResult);
    }

    processMoveResult(moveResult) {
        if (this.gameOver || moveResult.status.value === Constants.MoveStatus.INVALID) {
            return;
        }

        this.board.render(this.game.currentBoard);

        if (moveResult.status.value === Constants.MoveStatus.WIN || moveResult.status.value === Constants.MoveStatus.DRAW) {
            this.gameOver = true;
        }
    }
}
In createBoard(), add a line before the call to render() on the board. In that line, call the setColumnSelectionHandler() method:
export default class FrontEnd {
    createBoard() {
        let board = new Board(this.context, BoardConfig.MARGIN_LEFT, BoardConfig.MARGIN_TOP, BoardConfig.WIDTH, BoardConfig.HEIGHT);
        board.setColumnSelectionHandler((columnIndex) => this.playMove(columnIndex));
        board.render(this.game.currentBoard);
        return board;
    }
}
If you check your browser now while your server is running, you'll now be able to place tokens on the board, based on which column you clicked on.

Conclusion#
Congratulations! This was a long post (maybe the longest in this blog series so far!). Hopefully, it was worthwhile to you now that you've made a playable four-in-a-row game.
However, it's not quite clear what's going on in the game. The board stops updating when a player wins or the game ends in a draw. There's no indication of the current status of the game.
In the next post, you'll fix that problem. You'll add the status area component to the game. This will enable players and spectators to be aware of the current status of the game at any time.